

Cedar shingles add charm and durability to any home. This guide provides a comprehensive overview of the installation process, helping you achieve a professional finish with ease.
1.1 Benefits of Cedar Shingles
Cedar shingles offer a perfect blend of natural beauty and durability, making them a sought-after choice for homeowners. Their unique, rustic appearance enhances curb appeal while providing long-lasting protection against the elements. Cedar shingles are naturally resistant to decay and insect damage, ensuring they remain in excellent condition for years. They also provide excellent insulation, helping to regulate your home’s temperature and reduce energy costs. Additionally, cedar shingles are a sustainable and eco-friendly option, as cedar is a renewable resource. Their versatility allows them to complement a variety of architectural styles, from modern to traditional designs. With proper maintenance, cedar shingles can last for decades, making them a wise investment for any home. Their combination of aesthetic appeal, durability, and environmental benefits makes them a standout choice for siding and roofing projects.
1.2 Importance of Proper Installation
Proper installation of cedar shingles is crucial to ensure their durability and performance. Incorrect techniques can lead to water infiltration, structural damage, and reduced lifespan of the shingles. Adequate surface preparation, precise fastening, and proper spacing between shingles are essential to prevent issues like warping or uneven wear. A well-executed installation enhances the shingles’ natural resistance to decay and insects, ensuring they remain in excellent condition; Additionally, proper installation maximizes energy efficiency by maintaining a tight seal, reducing heat loss, and protecting against weather extremes. Following manufacturer guidelines and best practices guarantees a professional finish, preserves the aesthetic appeal, and maintains the structural integrity of your home. Investing time and effort into correct installation methods pays off with a beautiful, long-lasting, and low-maintenance exterior.

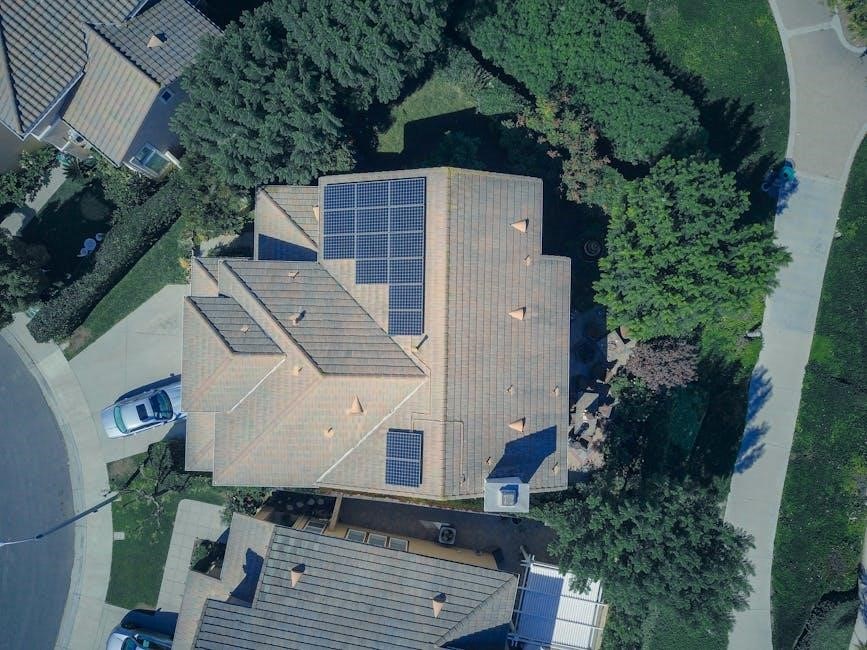
Preparation for Cedar Shingle Installation
Ensure the surface is clean, dry, and in good condition. Install a waterproof membrane and flashing. Repair any damaged areas to create a stable base for shingles.
2.1 Tools and Materials Needed
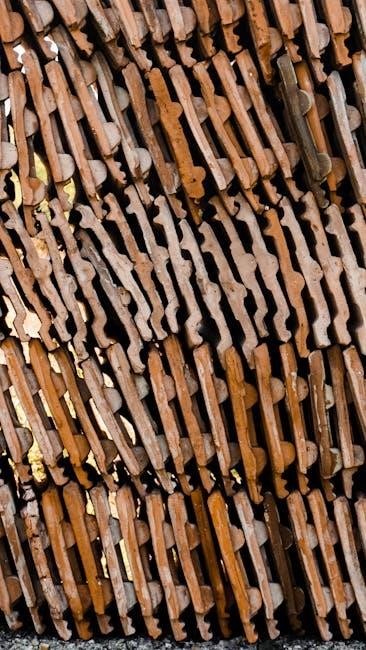
To successfully install cedar shingles, you’ll need specific tools and materials. Essential tools include a hammer, utility knife, tape measure, chalk line, and roof bracket. Safety gear like gloves and safety glasses is crucial for protection. Materials required are cedar shingles, underlayment, rust-resistant fasteners (nails or staples), starter strips, and ridge caps. Pre-formed hips and ridges can simplify the process. Ensure all tools are in good condition and materials are of high quality to guarantee a secure and durable installation.
2.2 Preparing the Surface
Proper surface preparation is vital for a successful cedar shingle installation. Begin by cleaning the roof deck, ensuring it is free from debris, dirt, and old roofing materials. Inspect and repair any damaged or rotten areas, as these can compromise the integrity of the installation. Apply a waterproof membrane or underlayment to protect the structure from moisture. Ensure the surface is dry and even before proceeding. Check for any gaps or cracks and seal them appropriately. Additionally, verify that the roof deck is securely fastened to prevent movement during installation. Proper preparation ensures a stable base for your cedar shingles, promoting durability and a professional finish.

Step-by-Step Installation Process
Follow a systematic approach to install cedar shingles, starting with the starter course, then applying shingles row by row, cutting as needed, and finishing with ridge caps for a professional finish.
3.1 Installing the Starter Course
Installing the starter course is the first step in the cedar shingle installation process. This course ensures proper alignment and serves as the foundation for the rest of the shingles. Begin by placing the first layer of shingles along the bottom edge of the roof or wall, aligning them with the edge. Secure each shingle with rust-resistant fasteners, such as galvanized nails, ensuring they penetrate the underlayment or sheathing by at least 1/2 inch. A second layer of shingles is then applied over the first, slightly offset to create a watertight seal. Proper spacing and alignment are critical to prevent gaps and ensure a smooth installation process. This step sets the stage for evenly laying subsequent rows of shingles, guaranteeing a professional and durable finish.
3.2 Applying Cedar Shingles
After installing the starter course, begin applying cedar shingles in rows, ensuring proper alignment and spacing. Start each row by aligning the first shingle with the edge of the starter course. Secure each shingle with rust-resistant fasteners, such as galvanized nails, spaced about 12 inches apart. Maintain a 5mm gap between shingles to allow for natural thermal movement. For a seamless look, stagger the joints between rows by starting each new row with a half-shingle. This pattern prevents water infiltration and enhances structural integrity. As you progress, ensure shingles are evenly spaced and aligned to maintain a professional finish. Properly securing each shingle and maintaining consistent spacing are key to achieving a durable and visually appealing installation. This step requires patience and attention to detail to ensure long-lasting protection and aesthetic appeal.
3.3 Cutting Cedar Shingles
Cutting cedar shingles is essential for achieving a proper fit and finish. Use a utility knife or a fine-tooth saw to make clean cuts without splitting the wood. Always cut shingles along the grain to maintain their integrity. For angled cuts, such as around vents or chimneys, use a miter box to ensure precision. When cutting, wear gloves to protect your hands from splinters. Avoid using dull tools, as they can tear the shingles. For curved cuts, a coping saw is ideal. After cutting, smooth any rough edges with sandpaper to prevent splintering during installation. Proper cutting ensures a seamless fit and enhances the overall appearance of your project. Always plan your cuts in advance to minimize waste and ensure efficiency.
3.4 Finishing with Ridge Caps
Finishing with ridge caps is the final step in completing your cedar shingle installation. Ridge caps are pre-formed or hand-cut shingles that cover the ridge line of your roof, protecting it from weather damage and adding a polished finish. Measure the ridge line and cut the caps to fit, ensuring they align seamlessly. Use a waterproof adhesive to secure them, then fasten with rust-resistant nails or staples. For a professional look, overlap the caps slightly and ensure they lie flat. Pre-formed ridge caps are available in various materials, such as copper or aluminum, offering durability and aesthetic appeal; Properly installed ridge caps prevent water infiltration and enhance the overall durability of your cedar shingle roof. This step completes the installation, giving your project a clean and finished appearance.
Tips for a Professional Finish
Ensure proper spacing, align shingles neatly, and use high-quality materials. This enhances durability and achieves a polished, professional appearance for your cedar shingle installation project.
4.1 Proper Spacing Between Shingles
Proper spacing between cedar shingles is essential for a professional-looking finish. Allow a 5mm gap between each shingle to accommodate natural thermal expansion and contraction. This prevents warping and ensures longevity. Always align shingles evenly, maintaining consistent spacing across the entire surface. Use a spacer guide or measuring tool to achieve uniformity. Proper spacing also enhances the shingles’ natural beauty, creating a balanced and polished appearance. Avoid over-tightening, as this can lead to buckling or uneven wear. By adhering to these guidelines, you can ensure your cedar shingle installation remains durable and visually appealing for years to come. Proper spacing is a critical step in achieving a professional finish and protecting your investment.
4.2 Using the Right Fasteners
Using the right fasteners is crucial for a secure and durable cedar shingle installation. Always use rust-resistant fasteners, such as hot-dip galvanized, aluminum, or stainless steel nails or staples, to prevent corrosion and ensure long-term protection. Fasteners should penetrate the stiff sheathing by at least 1/2 inch to provide a strong hold. Nails are preferred for their superior grip compared to staples, but both can be effective if installed correctly. Avoid using standard steel fasteners, as they can rust over time and compromise the integrity of the installation. Proper fastening techniques prevent shingles from shifting or loosening due to weather conditions. By selecting the right fasteners and ensuring they are installed correctly, you can safeguard your cedar shingles against damage and extend their lifespan. This step is vital for achieving a professional and enduring finish.
4.3 Maintaining the Installation
Maintaining your cedar shingle installation is essential to ensure its longevity and appearance. Regularly inspect the shingles for signs of damage, wear, or debris accumulation. Clean leaves, branches, and other materials that may collect on the surface, as they can trap moisture and lead to rot or mold. Check for gaps or loose shingles and address them promptly to prevent further damage. Applying a waterproof sealant or finish periodically can protect the wood and preserve its natural beauty. Additionally, ensure proper ventilation to prevent moisture buildup, which can compromise the integrity of the shingles. Regular maintenance not only extends the life of your cedar shingles but also maintains their aesthetic appeal. By staying proactive, you can enjoy the durability and charm of your cedar shingle installation for years to come.
Common Mistakes to Avoid
Avoiding common mistakes ensures a successful cedar shingle installation. Insufficient surface preparation, improper fastening, and ignoring weather conditions can lead to premature wear and structural issues. Proper planning is key.
5.1 Insufficient Surface Preparation
Insufficient surface preparation is a common mistake that can lead to significant issues with cedar shingle installation. The roof deck must be clean, dry, and free from debris or old roofing materials. Failing to address damaged or rotted plywood can result in uneven shingle placement and structural weaknesses. Additionally, not installing a waterproof membrane or underlayment can expose the roof to moisture damage, compromising the integrity of the shingles. Proper preparation ensures a stable base for the shingles, preventing premature decay and ensuring a secure, weather-tight seal. Neglecting this step can lead to costly repairs and shorten the lifespan of the roof. Always inspect and repair the surface before proceeding with installation to avoid long-term problems.
5.2 Improper Fastening Techniques
Improper fastening techniques are a critical mistake during cedar shingle installation. Using the wrong type or size of fasteners can lead to shingle damage and compromise the roof’s integrity. Nails or staples must be rust-resistant, such as hot-dip galvanized, aluminum, or stainless steel, to withstand moisture and weathering. Fasteners should penetrate the stiff sheathing by at least 1/2 inch to ensure a secure hold. Over-tightening can split the shingles, while under-tightening may result in loose shingles that lift in the wind. Incorrect placement, such as nailing too close to the edges, can weaken the shingles and lead to premature decay. Proper fastening ensures the shingles remain securely in place, protecting the roof from leaks and structural damage. Always follow manufacturer guidelines for fastener type, spacing, and depth to achieve a durable and weather-tight installation;
5.3 Ignoring Weather Conditions
Ignoring weather conditions is a common mistake that can severely impact the success of your cedar shingle installation. Moisture, high winds, and extreme temperatures can compromise the integrity of the materials and the installation process. Installing cedar shingles in rainy or humid conditions can lead to warping or swelling of the wood, while high winds can dislodge shingles or make the installation process unsafe. Additionally, freezing temperatures can make the shingles brittle and prone to cracking. It is essential to check the weather forecast and ensure the roof deck is clean, dry, and in good condition before starting. Allow shingles to acclimate to the site’s temperature and humidity for at least 24 hours before installation. Always avoid working in harsh weather conditions to ensure a secure and durable finish.
Safety Considerations
Safety is crucial when installing cedar shingles. Always wear gloves, safety glasses, and a harness. Ensure proper ladder setup and maintain a clean workspace to prevent accidents and injuries.
6.1 Essential Safety Gear
When installing cedar shingles, it’s crucial to wear proper safety gear to protect yourself from potential hazards. Start with a pair of durable, grip-enhancing gloves to prevent cuts and splinters while handling shingles. Safety glasses or goggles are a must to shield your eyes from debris or falling particles. A harness is essential if you’re working at heights to prevent falls. Additionally, wear a dust mask when cutting or sanding cedar to avoid inhaling sawdust. Steel-toed boots or sturdy footwear will protect your feet from heavy tools or dropped materials. A hard hat is also recommended if others are working above you. Ensure all gear fits properly and is in good condition before starting your project. Regularly inspect your safety equipment to maintain its effectiveness and longevity.
6.2 Best Practices for Working at Heights
Working at heights during cedar shingle installation requires meticulous attention to safety practices. Always ensure ladders are placed on firm, level ground and consider using ladder stabilizers or having someone hold the ladder for added stability. Maintain three points of contact with the ladder—either two hands and one foot or two feet and one hand. Avoid overreaching; instead, move the ladder frequently to stay within a safe range. Use scaffolding when possible, as it provides a more stable work surface. Check overhead for power lines or branches before starting. Take regular breaks to rest and hydrate, and never work at heights in poor weather conditions. Always have a spotter or assistant to monitor your work and provide support if needed. Ensure all tools and materials are securely tied off or lifted using ropes or pulleys to prevent accidents. Proper planning and precautions can significantly reduce risks and ensure a safe working environment.