

Whalen TV Stand Instructions: A Comprehensive Guide
Navigating the assembly of your Whalen TV stand is streamlined with resources like the BILT app‚ offering interactive 3D guides and 73 steps.
Verify all parts and hardware before starting‚ with an average assembly time of approximately two hours‚ ideally completed by two people.
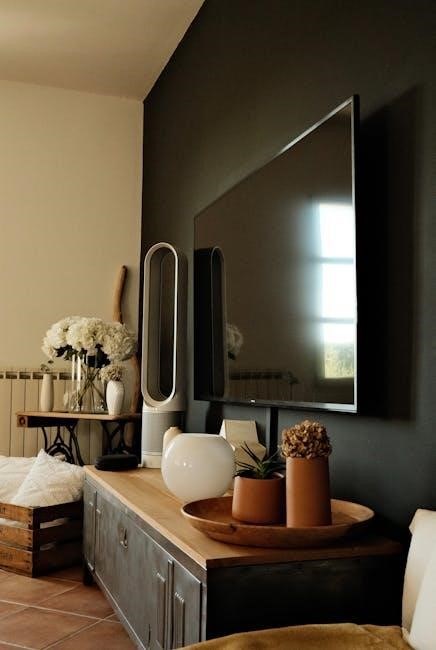
The Whalen TV stand‚ particularly the Xavier 3-in-1 model‚ represents a versatile solution for modern entertainment setups. It’s designed to accommodate a range of television sizes and offers adaptable functionality‚ including swivel mounting and tilting capabilities. This stand isn’t just a piece of furniture; it’s an engineered system intended to enhance your viewing experience while providing stylish storage.
Understanding its core features is crucial before beginning assembly. The 3-in-1 design allows for configuration as a standard TV stand‚ a swivel mount for optimal viewing angles‚ or a tilting platform for improved ergonomics. The availability of digital instructions via the BILT app significantly simplifies the process‚ offering interactive 3D guides to ensure a smooth and accurate build. Careful attention to the parts list and hardware verification is paramount for a successful outcome.
This guide will walk you through each step‚ ensuring a secure and aesthetically pleasing result.
Understanding the 3-in-1 Functionality
The Whalen Xavier TV stand’s core appeal lies in its adaptable 3-in-1 design. This isn’t a single‚ fixed configuration‚ but rather three distinct modes tailored to different needs and spaces. Firstly‚ it functions as a traditional TV stand‚ providing a stable surface for your television and accompanying devices.
Secondly‚ the integrated swivel mount allows for a 360-degree rotation‚ enabling optimal viewing angles from various points in the room. This is particularly useful in open-concept living areas. Finally‚ the tilting mechanism provides vertical adjustment‚ reducing glare and improving viewing comfort.
These features combine to offer a highly customizable experience. The ability to switch between modes allows users to adapt the stand to their specific requirements‚ maximizing both functionality and aesthetic appeal. Careful consideration of your room layout and viewing habits will help you determine the ideal configuration.
Tools Required for Assembly
Successful assembly of your Whalen TV stand necessitates a few essential tools‚ though the exact requirements can vary slightly depending on the specific model. While not always included‚ a Phillips head screwdriver is absolutely crucial for securing the majority of the hardware. A flathead screwdriver may also be needed for certain adjustments or tightening procedures.
For those comfortable with power tools‚ a power drill with a Phillips head bit can significantly expedite the process. However‚ exercise caution to avoid over-tightening screws‚ which could damage the particleboard.
Additionally‚ a rubber mallet can be helpful for gently tapping components into place‚ ensuring a snug and secure fit. The BILT app‚ a valuable resource‚ explicitly details the tools required for your specific Whalen TV stand model‚ providing a clear checklist before you begin.
Parts and Hardware List Verification
Before commencing assembly of your Whalen TV stand‚ a meticulous verification of all included parts and hardware is paramount. The provided parts list typically includes the Top Panel with Metal Frame (A)‚ the Middle Shelf Frame (B)‚ and the Bottom Shelf with Metal Frame (C). Ensure each of these major components is present and free from damage.
Carefully inventory all hardware‚ including screws‚ bolts‚ and any specialized connectors; Discrepancies at this stage can lead to frustrating delays later. Refer to the manual or the BILT app for a detailed breakdown of quantities and types.
If any parts are missing‚ immediately contact Whalen Furniture’s customer support for replacements‚ avoiding potential complications during the build process. A complete inventory guarantees a smoother‚ more enjoyable assembly experience.

Assembly Process: Step-by-Step
Begin by attaching the metal frames‚ then assemble the bottom shelf‚ followed by connecting the middle shelf frame and finally securing the top panel.
Step 1: Attaching the Metal Frames
Initiating the assembly‚ carefully unpack the Top Panel with Metal Frame (A) and the Bottom Shelf with Metal Frame (C). These pre-assembled components form the foundational structure of your Whalen TV stand. Ensure you have adequate workspace to prevent scratching or damage during this stage.
Locate the necessary hardware – typically screws – as indicated in the parts list. Gently align the metal frames with the corresponding pre-drilled holes on the panels. Begin by loosely attaching the screws‚ allowing for slight adjustments. Avoid fully tightening them at this point to maintain flexibility.
Double-check the alignment of the frames with the panels‚ ensuring they are flush and square. Once satisfied with the positioning‚ systematically tighten all screws securely. This step is crucial for the overall stability and structural integrity of the TV stand. Proper attachment of the metal frames is the cornerstone of a successful assembly.
Step 2: Assembling the Bottom Shelf
With the metal frames attached to the Top Panel and Bottom Shelf‚ focus now on reinforcing the lower section. The Bottom Shelf with Metal Frame (C) requires careful attention to ensure a stable base for your television. Refer to the hardware list to identify the specific screws and connectors needed for this step.
Position the Bottom Shelf assembly upright. Locate the pre-drilled holes designed for connecting additional support pieces‚ if any are included in your model. Align these pieces carefully and loosely attach them with the appropriate screws. Again‚ avoid full tightening initially.
Inspect the alignment of all components‚ ensuring the bottom shelf is level and square. Once satisfied‚ systematically tighten all screws‚ creating a robust and stable foundation. This step is vital for preventing wobbling and ensuring the TV stand can safely support the weight of your television.

Step 3: Connecting the Middle Shelf Frame
Now‚ integrate the Middle Shelf Frame (B) into the structure‚ bridging the gap between the top and bottom sections. This frame adds crucial stability and provides additional storage or display space. Carefully position the frame between the already assembled top and bottom components‚ aligning the pre-drilled holes.
Utilize the designated screws and connectors from the hardware list to attach the middle shelf frame. As with previous steps‚ begin by loosely fastening all connections‚ allowing for adjustments. Ensure the frame is level and properly aligned before proceeding to tighten the screws.
Double-check the stability of the entire assembly after connecting the middle shelf. A secure middle frame is essential for distributing weight evenly and preventing the TV stand from becoming unstable. Tighten all screws firmly‚ but avoid over-tightening‚ which could damage the materials.
Step 4: Securing the Top Panel
With the frame assembled‚ carefully position the Top Panel with Metal Frame (A) onto the structure. This panel forms the ultimate surface for your television and completes the primary build of the TV stand. Align the top panel precisely with the assembled frame‚ ensuring all edges are flush and even.
Employ the appropriate screws and hardware specified in the parts list to securely fasten the top panel to the frame. Similar to previous steps‚ initially loosely attach all screws to allow for minor adjustments. Confirm the panel is perfectly aligned and level before fully tightening each screw.
Finalize the assembly by firmly tightening all screws‚ ensuring a robust and stable connection between the top panel and the supporting frame. A securely fastened top panel is critical for safely supporting your television’s weight.
Advanced Features & Adjustments
Explore the Whalen TV stand’s swivel mounting and tilting mechanisms for optimal viewing angles‚ enhancing your entertainment experience with customizable adjustments.
Swivel Mounting Explained
The Whalen Xavier 3-in-1 TV stand boasts a convenient swivel mounting feature‚ allowing for flexible TV positioning within your viewing space. This functionality is particularly useful for rooms with multiple seating arrangements or where glare from windows might be an issue. The metal frame integrated into the top panel is key to this feature‚ providing a robust and stable base for the swiveling action.
To utilize the swivel‚ ensure the TV is securely mounted to the top panel following the provided instructions. Gently apply pressure to the sides of the TV to initiate the swivel motion. The range of motion will depend on the specific model‚ but it generally allows for a significant degree of adjustment. Regularly check the tightness of all mounting hardware to maintain stability and prevent accidental movement. Remember to distribute the weight of the TV evenly across the swivel base for optimal performance and longevity.
TV Tilting Mechanism – How to Use
The Whalen Xavier 3-in-1 TV stand’s tilting mechanism enhances viewing comfort by allowing you to adjust the vertical angle of your television. This is especially beneficial for reducing neck strain or minimizing reflections. The tilting function operates in conjunction with the swivel mount‚ providing a comprehensive range of motion for optimal viewing.
To adjust the tilt‚ locate the designated tilting adjustment points on the mounting bracket. Typically‚ these involve loosening knobs or screws‚ allowing you to gently incline or decline the TV screen. Ensure the TV is securely locked in your desired position after adjustment. Always support the TV during tilting to prevent accidental drops or damage. Regularly inspect the tilting mechanism for any signs of wear or looseness‚ and tighten hardware as needed to maintain stability and safety.
Adjusting Shelf Height (If Applicable)
Certain Whalen TV stand models offer adjustable shelf heights‚ providing flexibility to accommodate various media devices and accessories. This feature typically utilizes pre-drilled holes along the inner sides of the stand’s frame. Shelf supports‚ often small metal or plastic pegs‚ are inserted into these holes at the desired height.
To adjust a shelf‚ carefully remove any items placed on it. Gently lift the shelf upwards to disengage the existing supports. Then‚ reposition the supports into the new set of holes at your preferred height. Finally‚ carefully lower the shelf onto the newly positioned supports‚ ensuring it sits securely. Always distribute weight evenly on the shelves to maintain stability and prevent tipping. Regularly check the supports for proper seating and adjust as needed.

Troubleshooting Common Issues
Addressing problems like missing parts‚ screw alignment difficulties‚ or stand instability is crucial; consider contacting support or exploring alternative solutions for a secure setup.
Missing Parts – What to Do
Discovering missing components during Whalen TV stand assembly can be frustrating‚ but several avenues exist for resolution. First‚ meticulously re-check the packaging and all included materials – sometimes smaller items are concealed within protective layers.
If a part is genuinely absent‚ immediately contact Whalen Furniture’s customer support. Have your TV stand model number and a detailed list of the missing hardware readily available.
Many retailers also offer assistance in obtaining replacement parts‚ so check with the store where you purchased the unit. Providing proof of purchase will expedite the process.
As a temporary measure‚ if the missing part doesn’t compromise structural integrity‚ carefully proceed with assembly‚ noting the omission. However‚ prioritize obtaining the correct replacement to ensure the stand’s stability and longevity. Avoid improvising with unsuitable substitutes.
Difficulty with Screw Alignment
Encountering screw alignment issues during Whalen TV stand assembly is a common challenge. Often‚ this stems from not fully seating the initial screws‚ creating a misalignment in subsequent connections. Ensure each screw is started by hand before applying power tool assistance‚ preventing cross-threading.
If resistance is felt‚ immediately stop and slightly loosen previously tightened screws. This allows for minor adjustments and realignment. Avoid forcing screws‚ as this can strip the threads in the particleboard or metal frames.
Applying gentle pressure while turning the screw can help guide it into the correct alignment. A magnetic screwdriver is also beneficial for holding the screw in place.
Double-check the orientation of the parts; sometimes‚ a reversed component can cause alignment problems. If issues persist‚ consult the BILT app’s interactive 3D guides for visual clarification.
Instability of the Stand
An unstable Whalen TV stand often indicates a problem with the foundational assembly. Verify all screws are tightened securely‚ particularly those connecting the metal frames to the top‚ middle‚ and bottom shelves. Loose connections are the primary cause of wobbling.
Ensure the stand is placed on a level surface. Uneven flooring can contribute significantly to instability. Consider using shims under the legs to compensate for minor floor imperfections.
If the swivel mounting is engaged‚ confirm it’s locked into a stable position. Improper locking can create an off-balance feel.
Check that the weight distribution is even. Avoid concentrating excessive weight on one side of the stand. For larger TVs‚ consider wall-mounting for added security and stability.

Safety Precautions During Assembly
Prioritize preventing TV damage and ensuring structural integrity during assembly; childproof the stand by securing it to the wall for optimal safety.
Preventing Damage to the TV
Carefully unpack the TV and inspect it for any pre-existing damage before commencing assembly of the Whalen TV stand. Lay down a protective layer – a blanket or cardboard – on the floor to cushion the screen during the process.
When positioning the TV onto the stand‚ avoid placing excessive weight or pressure on the screen. Ensure the TV is centered and balanced on the stand to prevent tipping.
If utilizing the swivel or tilting features‚ do so gently and cautiously. Avoid forceful movements that could strain the mounting mechanism or damage the TV’s connections. Regularly check the tightness of all screws and bolts to maintain a secure fit.
Always refer to both the Whalen TV stand instructions and your TV’s manual for weight capacity limits and recommended mounting procedures. Ignoring these guidelines could lead to irreversible damage.
Ensuring Structural Integrity
Prior to full assembly‚ meticulously verify all parts against the hardware list provided in the Whalen TV stand instructions. Confirm that each screw‚ bolt‚ and panel is present and undamaged.
During the assembly process‚ tighten all fasteners securely‚ but avoid over-tightening‚ which could strip threads or compromise the structural integrity of the materials. Follow the step-by-step guide in the correct sequence.
Pay close attention to the metal frame connections‚ ensuring they are firmly attached and aligned. Regularly inspect the stand for any signs of looseness or instability after assembly.
Distribute the weight of the TV evenly across the stand’s surface. Avoid placing excessive weight on any single point. A stable foundation is crucial for long-term durability.
Childproofing the TV Stand
To safeguard children‚ securely anchor the Whalen TV stand to the wall using appropriate anti-tip hardware‚ especially crucial given potential swivel or tilting features. This prevents accidental toppling‚ a significant safety hazard.
Conceal all cords and cables to eliminate tripping hazards and prevent children from pulling on them‚ potentially bringing the stand down. Utilize cord management solutions for a tidy and safe setup.
Regularly inspect the stand for loose parts or screws‚ tightening them promptly. Ensure the swivel and tilting mechanisms function smoothly and are not easily manipulated by young children.

Educate children about the dangers of climbing on or near the TV stand. Establish clear boundaries and supervise their interactions with the unit. Prioritize a safe viewing environment.

Using the BILT App for Instructions
Access thousands of instructions‚ including Whalen’s‚ via the free BILT app; enjoy interactive‚ 3D assembly guides and required tool lists for easy setup.
Downloading and Accessing Instructions
Begin by downloading the BILT app‚ available on both iOS and Android platforms‚ directly from your device’s app store. Once installed‚ create a free account or log in if you already have one. Within the app’s search function‚ type “Whalen” or specifically “Whalen Xavier 3-in-1 TV Stand” to locate the relevant instructions.
The app provides a comprehensive library of assembly guides from numerous brands‚ making it a centralized resource for your project. Selecting your TV stand will unlock access to the interactive 3D guides‚ parts lists‚ and tool requirements. BILT eliminates the need for traditional paper manuals‚ offering a more intuitive and user-friendly experience.
Ensure you have a stable internet connection during the download and initial access to the instructions. The app’s interface is designed for easy navigation‚ allowing you to zoom‚ rotate‚ and explore the assembly process at your own pace.
Interactive 3D Assembly Guides
BILT’s standout feature is its interactive 3D assembly guides‚ transforming the often-daunting task into a visually clear process. These guides showcase each step with rotating 3D models of the Whalen TV stand‚ allowing you to examine connections from every angle. You can zoom in on specific components and understand how they fit together before physically attempting the assembly.
Unlike static images or videos‚ these guides respond to your interaction. As you virtually complete each step‚ the model updates‚ providing real-time feedback. The app highlights the necessary parts and hardware for each stage‚ minimizing confusion and errors.
This immersive experience significantly reduces assembly time and frustration‚ even for those with limited experience. The 3D guides are particularly helpful for visualizing complex connections and ensuring proper alignment‚ leading to a more stable and secure TV stand.

Alternative Solutions & Considerations
If assembly proves challenging‚ consider purchasing a new‚ pre-assembled TV stand or repurposing an existing one for a simpler solution.

Comparing to New TV Stand Purchases
When evaluating the Whalen TV stand assembly experience‚ it’s prudent to compare the effort required against the convenience of purchasing a new‚ fully assembled unit. While the Whalen stand offers a cost-effective solution at around $138‚ the assembly process‚ involving 73 steps and potentially requiring two people‚ can be time-consuming.
A new‚ pre-built TV stand eliminates the need for tools and the potential for frustration with screw alignment or missing parts. However‚ these stands typically come with a higher price tag. Consider the value of your time and skill level. If you’re comfortable with DIY projects and have the necessary tools‚ the Whalen stand can be a rewarding option.
Conversely‚ if you prioritize convenience and a hassle-free setup‚ investing in a new‚ assembled stand might be the more sensible choice‚ despite the increased cost. Weigh the financial savings against the time and effort involved in assembly to determine the best fit for your needs.
Utilizing Existing TV Stands
Before committing to the Whalen TV stand assembly‚ assess whether repurposing an existing TV stand is feasible. If you already possess a suitable stand‚ placing the TV directly on top of it offers a free and immediate solution‚ bypassing the 73-step assembly process entirely. This is particularly appealing if you’re seeking a quick and effortless setup.
Consider the height and stability of your current stand. Ensure it provides adequate support and positions the TV at a comfortable viewing angle. If the existing stand lacks the desired features‚ such as swivel mounting‚ evaluate whether those additions are truly necessary.
Alternatively‚ explore modifying your existing stand to accommodate the TV. This might involve adding shelves or reinforcing the structure. Utilizing what you already have minimizes cost and reduces the environmental impact compared to purchasing and assembling a new unit.