

Craftsman Snow Blower Instruction Manual: A Comprehensive Guide
Navigating winter weather demands a reliable machine! This manual details Craftsman snow blower operation, maintenance, and troubleshooting, referencing resources like YouTube and eBay for parts․
Understanding Your Craftsman Snow Blower
Your Craftsman snow blower is engineered for efficient snow removal, but familiarity with its components is crucial․ This machine utilizes an auger to collect snow and an impeller to discharge it․ Understanding the interplay between these parts, alongside the electric start system (if equipped), maximizes performance․
Different Craftsman series, like the Cx Series, may have unique features․ Resources like online parts diagrams and retailers (including eBay) are invaluable for identifying specific components and understanding their function․ Proper operation hinges on knowing your model!
Model Identification & Serial Number Location
Accurate model and serial number identification is paramount for ordering parts, accessing specific documentation, and ensuring correct maintenance procedures․ Typically, a decal is affixed to the snow blower’s frame, often near the auger housing or engine․
This decal contains both the model number and the serial number․ Referencing these numbers when searching for parts online – on platforms like eBay – guarantees compatibility․ Keep these numbers recorded for future service needs and warranty claims․
Safety Precautions & Warnings
Prioritize safety during snow blower operation! Always disconnect the spark plug wire before performing any maintenance or adjustments․ Never operate the machine indoors or in poorly ventilated areas due to carbon monoxide risk․
Keep hands and feet clear of the auger and discharge chute at all times․ Avoid loose clothing and jewelry․ Be mindful of bystanders, pets, and obstacles while operating․ Thoroughly review all safety guidelines before each use to prevent injury․
General Safety Rules
Essential safety practices are crucial for operation․ Read this manual completely before assembly and use․ Never allow children to operate the snow blower․ Wear appropriate safety glasses and sturdy footwear․
Ensure the work area is well-lit and free of debris․ Never alter or disable safety features․ Be aware of potential hazards like ice patches and hidden objects․ Always shut off the machine and wait for all moving parts to stop before inspecting or cleaning․
Operating Safety
Prioritize safe operation during each use․ Never operate the snow blower near roadways or pedestrians․ Avoid throwing snow into traffic․ Keep hands and feet clear of the auger and impeller at all times․
Do not attempt to clear extremely deep or heavy snow in a single pass․ If the auger becomes clogged, shut off the machine and use a clearing tool – never your hands! Be mindful of the discharge direction and avoid aiming it at people or property․
Assembly Instructions
Careful assembly ensures optimal performance․ Begin by attaching the handle to the main body, securing it with the provided bolts – ensure a firm grip․ Next, install the auger housing, aligning it correctly with the drive shaft․
Finally, attach the scraper bar, adjusting its height for effective snow removal․ Double-check all connections before operation․ Refer to diagrams for precise placement of components, guaranteeing a secure and functional snow blower․
Handle Assembly
Proper handle installation is crucial for control․ Begin by loosening the bolts connecting the handle to the snow blower’s chassis․ Align the handle grips with the desired operating position, ensuring comfortable reach․
Securely tighten all bolts, verifying stability before each use․ Adjust the handle height if necessary, catering to user preference․ A firmly attached handle enhances maneuverability and operator safety during snow removal operations․
Auger Housing Installation
Securely attaching the auger housing is paramount for efficient snow clearing․ Carefully position the auger housing beneath the snow blower, aligning mounting points․ Insert and tighten all bolts, washers, and retaining clips, ensuring a flush and stable fit․
Double-check all connections before operation․ Improper installation can lead to damage or unsafe operation․ Refer to the parts diagram for correct component placement and torque specifications for optimal performance․
Scraper Bar Attachment
The scraper bar is crucial for a clean snow removal path․ Align the scraper bar with the mounting brackets located on the bottom of the auger housing․ Secure it using the provided bolts and locking nuts, tightening them firmly to prevent shifting during operation․
Regularly inspect the scraper bar for wear and tear, replacing it when necessary to maintain optimal scraping performance․ A worn scraper bar reduces cleaning efficiency and can cause premature wear on other components․
Pre-Operation Checks
Before each use, thorough checks ensure safe and efficient operation․ Verify the oil level using the dipstick, adding oil as needed to maintain the correct level․ Always use the recommended fuel type, carefully filling the tank while avoiding spills․
Critically, inspect the shear pins for damage; these protect the auger․ Replace any bent or broken pins before starting the machine to prevent serious damage․ Confirm all guards and covers are securely in place․
Oil Level Check
Maintaining proper oil levels is crucial for engine longevity․ Park the snow blower on a level surface․ Locate the oil dipstick, typically marked with a yellow or orange handle․ Remove the dipstick, wipe it clean with a lint-free cloth, and fully reinsert it․
Remove the dipstick again and check the oil level; it should fall between the “Min” and “Max” marks․ Add the recommended oil type if needed, avoiding overfilling․
Fuel Type & Filling
Using the correct fuel is vital for optimal performance․ Craftsman snow blowers typically require fresh, unleaded gasoline with an octane rating of 87 or higher․ Avoid fuels containing ethanol exceeding 10%, as it can damage the engine․
Before filling, ensure the fuel tank is clean and the area is well-ventilated․ Carefully pour fuel into the tank, avoiding spillage, and do not overfill․ Always use a funnel․
Shear Pins – Inspection & Replacement
Shear pins are safety devices protecting the auger and impeller․ Regularly inspect these pins for signs of wear, bending, or shearing – especially after hitting a hard object․ Damaged pins must be replaced with identical Craftsman-approved replacements․
Never use bolts or hardware as substitutes! Incorrect pins can cause severe damage․ Replacement is straightforward, typically involving removing a cotter pin and sliding out the old shear pin․
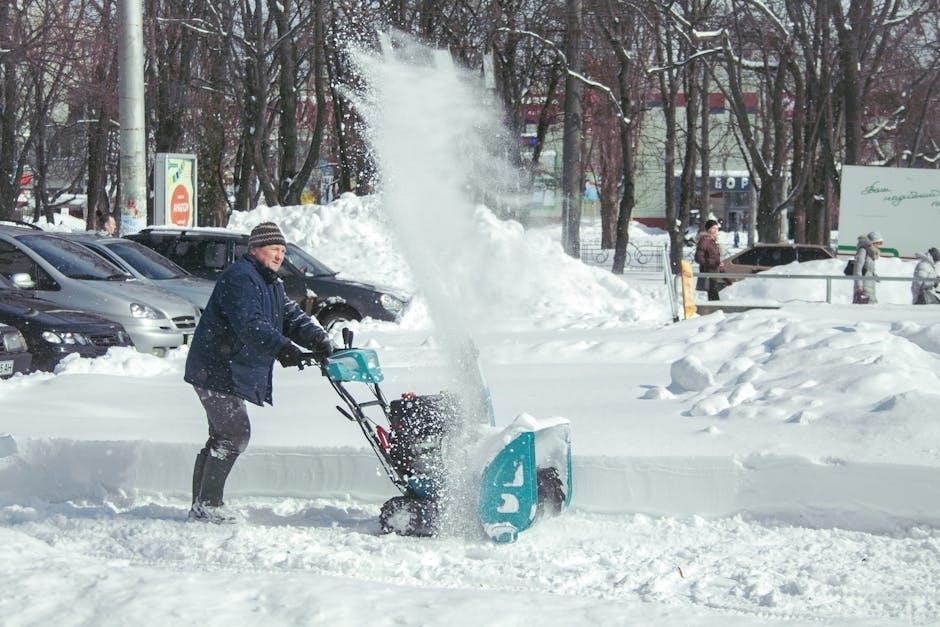
Starting & Operating Procedures
Before starting, ensure the auger housing is securely attached and the discharge chute is directed safely away from people and property․ Craftsman snow blowers offer both electric and recoil start options․
Electric start involves plugging into a grounded outlet and pressing the start button․ Recoil start requires firmly pulling the starter rope․ Once running, adjust the snow thrower direction using the chute control lever for optimal snow removal․
Electric Start Operation
For models equipped with electric start, ensure the snow blower is unplugged during assembly and maintenance․ Locate a grounded, weatherproof outlet near the machine․ Plug in the power cord securely before attempting to start․
Press and hold the electric start button until the engine engages․ Release the button immediately upon startup․ If the engine doesn’t start, consult the troubleshooting section; avoid continuous button pressing․
Recoil Start Operation
For recoil start, confirm the fuel shut-off valve is open and the throttle is set to the start position․ Firmly grasp the recoil starter handle and pull it slowly until resistance is felt․
Then, pull the handle briskly and smoothly to initiate engine combustion․ Allow the cord to retract slowly․ Repeat as needed, avoiding rapid, forceful pulls․ If unsuccessful after several attempts, refer to the troubleshooting guide for assistance․
Adjusting Snow Thrower Direction
To change the snow discharge direction, locate the chute rotation lever, typically positioned near the operator’s control panel․ Gently move the lever to the desired angle, observing the chute’s movement․
Avoid forcing the lever beyond its limits․ Some models feature a remote chute control for convenient adjustment during operation․ Regularly check for obstructions hindering smooth rotation, ensuring optimal snow clearing performance and preventing motor strain․
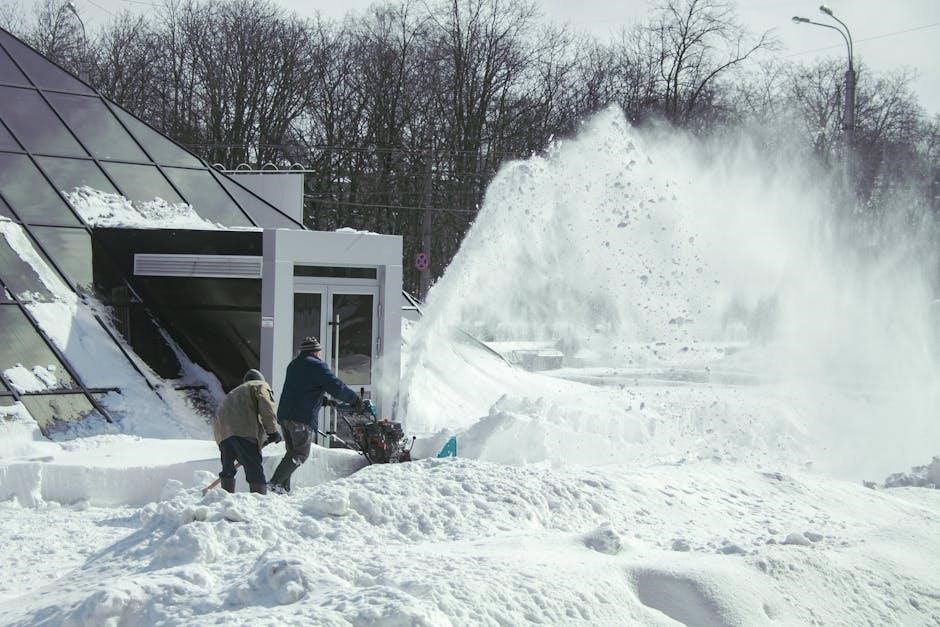
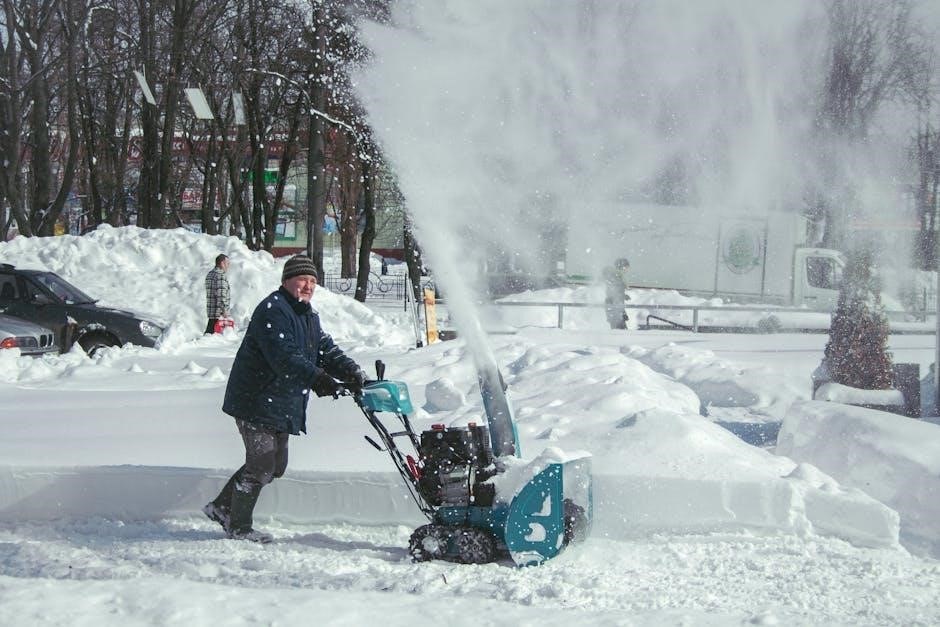
During Operation – Best Practices
Maximize efficiency by overlapping each pass slightly, preventing snow buildup․ Maintain a consistent speed, adjusting to snow depth and type․ Avoid throwing snow into the wind, as it reduces throwing distance and can cause drifting․
Regularly inspect the discharge chute for clogs and address them promptly․ Be mindful of surroundings, ensuring a safe operating distance from people, pets, and objects․ Prioritize safety and controlled movements․
Clearing Clogged Discharge Chute
Always disconnect the spark plug wire before attempting to clear a clog! Use a sturdy, non-metallic tool – never your hands – to dislodge ice and snow․ Avoid excessive force that could damage the chute or auger components․
If the clog persists, consider a wooden dowel or similar implement․ Ensure the snow blower is switched off and cooled down before proceeding․ Regular clearing prevents strain on the engine and maintains optimal performance․
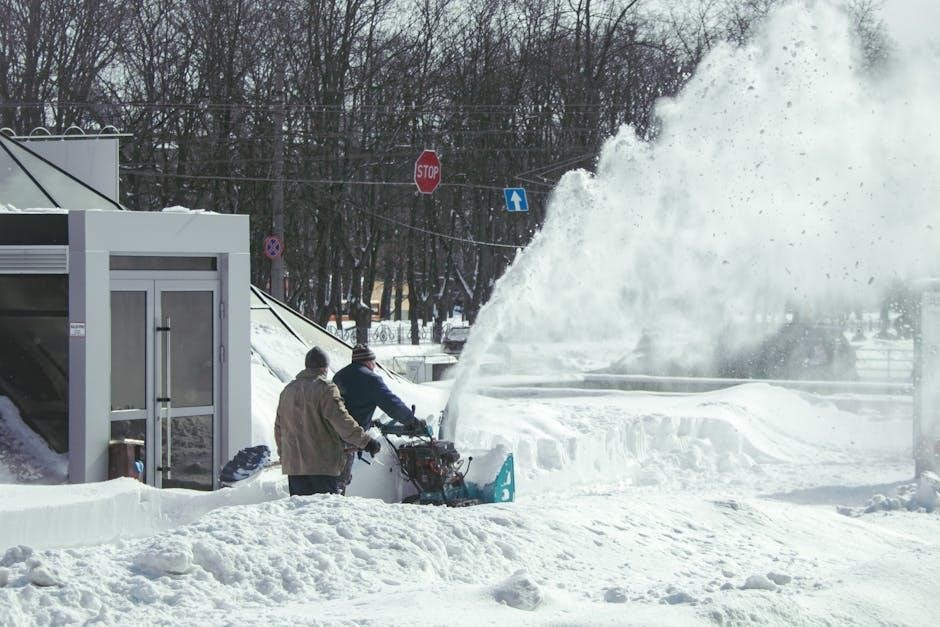
Optimal Snow Blowing Techniques
Overlap each pass slightly for complete snow removal․ Adjust the discharge chute direction to avoid throwing snow back towards your house or onto roadways․ Work with the wind whenever possible, directing the snow with the wind’s flow․

For deep snow, take multiple passes, reducing the depth with each one․ Avoid overloading the auger; slower, controlled operation is more effective than forcing it through heavy drifts․ Prioritize safety and awareness of surroundings․
Maintenance & Service
Regular maintenance extends your snow blower’s life․ Adhere to a scheduled maintenance plan, including belt inspections and replacements, and auger gearcase lubrication․ Consistent checks prevent costly repairs and ensure optimal performance during winter․
Properly maintained machines handle heavy snow loads efficiently․ Refer to parts diagrams available online and retailers like eBay for replacement components․ Prioritize safety when performing any service or repair work on your Craftsman snow blower․
Regular Maintenance Schedule
Prioritize upkeep for peak performance! Before each season, inspect belts for wear and tear, and lubricate the auger gearcase․ After every 20 hours of operation, check and tighten all bolts and fasteners․ Annually, replace the spark plug and examine the shear pins․
Consistent adherence to this schedule minimizes downtime and maximizes the lifespan of your Craftsman snow blower, ensuring reliable operation when winter storms strike․ Refer to online resources for detailed diagrams․
Belt Inspection & Replacement
Worn belts compromise power transfer! Regularly inspect drive and auger belts for cracks, fraying, or glazing․ A loose belt indicates wear and requires adjustment or replacement․ Disconnect the spark plug before any belt work․
Replacing a belt involves releasing tension, removing the old belt, and installing the new one, ensuring proper alignment․ Online parts retailers and diagrams simplify the process, guaranteeing a secure and efficient repair․
Auger Gearcase Lubrication
Proper lubrication extends gearcase life! The auger gearcase requires specific grease for optimal performance, protecting gears from wear and corrosion․ Consult your model’s specifications for the correct grease type․
Periodically inspect the gearcase for leaks and ensure the grease level is adequate․ Replenish or replace the grease as needed, following the recommended maintenance schedule․ Maintaining this component ensures reliable auger operation during harsh winter conditions․
Troubleshooting Common Issues
Encountering problems? This section offers solutions! Common issues include a snow blower failing to start, the auger not engaging, or discharge chute blockages․ Check fuel levels, spark plugs, and shear pins for starting problems․
If the auger isn’t turning, inspect the drive belt and shear pins․ A clogged chute requires careful clearing – always disconnect the spark plug first! Resources like YouTube can visually guide repairs․
Snow Blower Won’t Start
Frustrated by a non-starting machine? Begin by verifying fresh fuel and a fully charged battery (for electric start models)․ Inspect the spark plug for fouling and ensure a solid connection․ Check the safety interlock switches – they must be engaged for operation․
Confirm the fuel valve is open and the choke is properly set․ If issues persist, consult online resources like YouTube for diagnostic videos and potential solutions specific to your Craftsman model․

Auger Not Engaging
If the auger fails to spin, safety is paramount – immediately shut down the engine! First, check the shear pins; these are designed to break upon impact with a solid object, protecting the gearbox․ Replace any broken pins with the correct replacements․
Inspect the auger drive belt for wear or breakage․ A loose or damaged belt won’t transfer power effectively․ Online parts retailers, including eBay, offer replacement belts for various Craftsman models․
Discharge Chute Issues
A clogged discharge chute is a common problem, hindering snow expulsion․ Always disconnect the spark plug before attempting to clear any blockage! Use a sturdy, non-metallic tool – never your hands – to remove packed snow and ice․
Ensure the chute rotation mechanism isn’t obstructed․ Check for frozen cables or linkages․ Regularly inspect the chute for damage, and consult online parts diagrams to locate replacement components if needed, readily available through retailers like eBay․
Parts Diagrams & Ordering Information
Locating replacement parts is crucial for maintaining your Craftsman snow blower․ Detailed parts diagrams are often available online through the Craftsman website or dedicated parts retailers․ These diagrams help identify the correct component for your specific model․
Several retailers, including eBay, offer a wide selection of Craftsman snow blower parts․ Ensure you have your model number handy when ordering to guarantee compatibility․ Prompt replacement maintains optimal performance!
Locating Parts Diagrams Online
Finding the correct parts diagram streamlines repairs․ Start by visiting the official Craftsman website and navigating to the support or parts section․ Enter your snow blower’s model number to access model-specific diagrams․ Several third-party websites also archive older diagrams․
These diagrams visually represent exploded views of the snow blower, clearly labeling each component․ Utilize these resources to accurately identify the part you need before ordering, ensuring a successful repair!
Craftsman Parts Retailers
Numerous retailers supply Craftsman snow blower parts․ Sears PartsDirect is a primary source, offering a vast inventory and direct compatibility checks using your model number․ Local hardware stores, like Ace Hardware and True Value, often stock common replacement parts․
Furthermore, online marketplaces such as eBay provide access to both new and used parts, potentially at discounted prices․ Always verify the seller’s reputation and part compatibility before purchasing!
Storage & Off-Season Care
Proper storage safeguards your Craftsman snow blower’s longevity․ Before extended storage, stabilize the fuel with a fuel stabilizer to prevent degradation and starting issues next winter․ Drain the fuel tank if prolonged storage is anticipated – over six months․
Store the snow blower in a dry, sheltered location, protecting it from the elements․ A garage or shed is ideal․ Cover the unit to prevent dust accumulation and corrosion․
Fuel Stabilization for Storage
Fuel degradation during storage is a common issue․ Gasoline left sitting for extended periods can separate and form varnish, clogging the carburetor and hindering starting․ Adding a fuel stabilizer, readily available at auto parts stores, prevents this breakdown․
Follow the stabilizer’s instructions carefully, typically mixing it with fresh gasoline before filling the tank․ Run the engine briefly to circulate the stabilized fuel throughout the fuel system, ensuring complete protection during off-season storage․
Proper Storage Location
Selecting the right storage space is crucial for longevity․ Ideally, store your Craftsman snow blower in a dry, sheltered area like a garage, shed, or basement․ This protects it from the elements – rain, snow, and direct sunlight – which can cause rust and component damage․
Covering the snow blower with a tarp provides an extra layer of protection․ Avoid storing it directly on the ground; use pallets or a similar barrier to prevent moisture absorption․
Warranty Information
Your Craftsman snow blower is backed by a manufacturer’s warranty, protecting against defects in materials and workmanship․ Warranty duration varies by model, so consult your specific documentation for details․ Typically, it covers parts and labor for a defined period․
Keep your purchase receipt as proof of date․ To initiate a warranty claim, contact Craftsman customer support or an authorized service center․ Understand the exclusions – wear items aren’t usually covered․
Craftsman Snow Blower Warranty Details
Craftsman snow blower warranties generally offer coverage for one to three years, depending on the specific model and purchase date․ This typically includes defects in manufacturing and materials, covering both parts and labor costs for repairs․ However, the warranty doesn’t cover issues arising from misuse, neglect, or normal wear and tear․
Certain components, like shear pins or belts, are considered wear items and aren’t included․ Always register your product to activate the full warranty benefits!
Warranty Claim Process
To initiate a warranty claim, first gather your proof of purchase and the snow blower’s model and serial number․ Contact Craftsman’s customer service department via phone or their website to obtain a claim number and instructions․ You may need to take the unit to an authorized Craftsman service center for inspection․
Keep detailed records of all communication and repair attempts․ Craftsman will assess the issue and determine if it’s covered under warranty terms․
Craftsman Snow Blower Cx Series Specifics
The Craftsman CX Series snow blowers boast enhanced features for demanding conditions․ These models often include a larger engine displacement and heavier-duty auger systems․ Pay close attention to the specific CX model number, as features vary․ Refer to supplemental documentation for CX-series specific maintenance, like auger gearcase lubrication intervals․
Ensure proper shear pin selection for the CX series, as they may differ from standard Craftsman models․
Craftsman Snow Blower Electric Start Systems
Craftsman snow blowers with electric start offer convenient operation in cold weather․ Before each use, verify the battery is fully charged and connections are clean․ If the electric start fails, revert to the recoil start system․ Regularly inspect the starter solenoid and wiring for damage or corrosion․
Consult your model’s diagram for specific electric start component locations and replacement procedures․ YouTube tutorials can assist with troubleshooting․
Finding Craftsman Snow Blower Parts on eBay
eBay is a valuable resource for locating Craftsman snow blower replacement parts, especially for older models․ Utilize specific search terms including the model number and part description for accurate results․ Carefully review seller ratings and part compatibility before purchasing․
Compare prices and shipping costs from multiple sellers․ Be mindful of whether parts are new, used, or refurbished․ Diagrams and parts lists can aid in identifying the correct component needed for repair․